RSS
Showing posts with label crafts. Show all posts

Saturday, April 23, 2011

A Cute Easter Idea - Jelly Bean Prayer Jars

Saw this over on Mama Jenn.  
What a great way to share the message of Easter!!
Jelly Bean Prayer Jars

I wish I would have seen these earlier.  They would have made great Easter gifts for the kids' Sunday School teachers.  Oh well . . . we'll save in the file for "next year."  I bet even our Youth Group kids would like to make these.  Thanks, Mama Jenn for sharing this great idea!
Read Comments

Thursday, February 3, 2011

Snow Day Science

Yesterday, in light of the Great Groundhog Blizzard of 2011, all members of the CrazyLife Family had snow days from school!! 
Yay!!!

Snow days as a kid were the best. 
As an adult and a teacher . . . well, they are even better! 

Tuesday night the kids came home from school all excited about doing the "Snow Day Dance" and wearing their pajamas inside-outside, putting a spoon under their pillows, and placing ice cubes in the toilet.  Nevermind that school had already been called off for the next day - we did it with gusto!!!

And snow day it was!!!

But what to do with our snowday?  It was too cold to go outside, not to mention blowing and snowing like crazy!  So Mr. CrazyLife and Thing #1 decided to work on a project for her class at school.  She has been studying water in science class.  Mr. CrazyLife decided that they should make "super sand" for her to take into class and explain why it floats in water or clumps into blocks at the bottom.

So we did our own science experient!

And made our own "Moon Sand" in the process.  Ours was very simple, but you could add food coloring to it if you wanted.  Then put it in a tub and let the kids go to town playing!!!  We left quite a bit in the tub as a sensory plaything for yesterday, but also pulled some out to experiment putting it in water and some for Thing #1 to take to school when it resumes.

What you need:
Sand
1 can of Scotch Guard
Patience

Pour the sand into a tub.  Spray it with Scotch Guard.  Let dry. 
Repeat a few times.  Let dry. 
Play and enjoy!

(pictures coming soon - having connection issues with uploading!)
Read Comments

Monday, January 17, 2011

Make Your Own Vanilla Perfume

I've never been a big scented lotion or perfume user.  I'm not sure why, I just never had.  I'm the kind of person who finds something they like and sticks with it forever or until the company stops making it.  Which is just what has happend to my favorite perfumes and lotions.

My favorite lotion is the Bath and Body Works Plumeria scent.  It was my signature scent throughout college.  Friends said my dorm room even smelled like it.  Then about 4 years ago, they discontinued it.  I was so sad.  This past holiday season they brought it back out and I bought about five bottles to tide me over for a while!

My other signature scent is vanilla.  I've always been a huge fan of vanilla scents.  It's my all-time favorite smell.  It reminds me of cooking with my Gram.  It reminds me of something warm and homey.  I love it.  However, I've never found a vanilla perfume or lotion that works for me.  I did use Vanilla Fields for a long time, but then it changed.  I like a pure vanilla smell - not a fruity, flowery, musky one.

So I've been on the lookout for something with either of these two scents for a long time.  I've searched out making your own and so forth and never really come across anything.

Imagine my suprise and delight when I came across this post today from Natural Mommie: How to Make Vanilla Perfume.  I was so excited!! I can't wait to get home and start my own vanilla oil perfume!!


Here's what you need:
-Knife
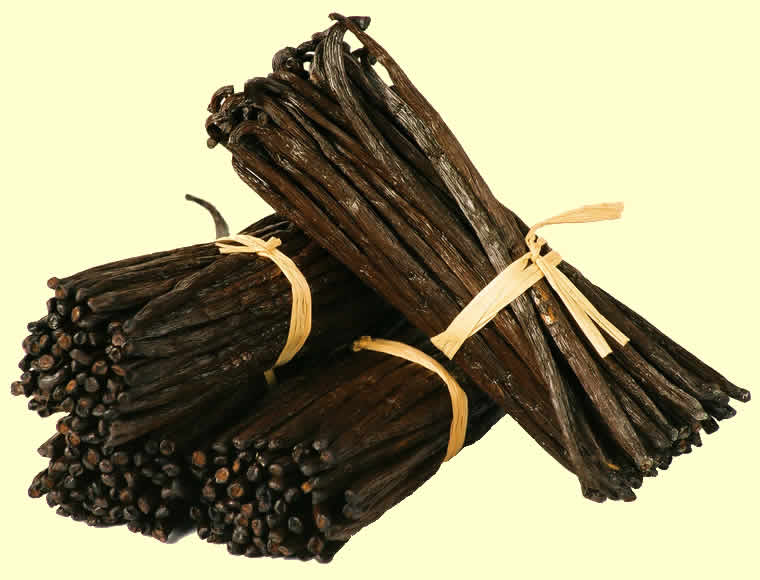
– Vanilla beans
– Vodka
– Glass jar
– Strainer {mesh, nylons or cheesecloth}
– Jojoba oil {or any oil – grapeseed, etc.}

Check your local health food store for vanilla beans or any store that sells bulk spices.  Sometimes you can find them at the grocery, but they tend to be more expensive there.  I'm also planning on using coconut oil - that should make a nice blend with the vanilla (despite my claims of PURE vanilla scent love above! =) )

Directions:
1. Take your knife and gently cut down the middle of the vanilla bean lengthwise. Scrape your knife along the inside edge of the bean to release the paste. Drop the paste into a glass jar. Cut the rest of the vanilla bean into small pieces and drop those in the jar as well. You can use as many vanilla beans as you wish.
2. Pour vodka directly into the glass jar, on top of the vanilla beans. Add enough alcohol to cover all the bean pieces. This allows the alcohol to soak into the beans and absorb the scent of their oils.
3. Place the container in a warm, dry place and let stand for 2 weeks to 2 months Remove the lid every few weeks to test the strength of the scent. Use when ready. Strain out the small pieces of vanilla. You’ll want the perfume to be nice and smooth without any pieces that might irritate your skin.
4. Add your strained alcohol mixture back into your glass jar and top it off with jojoba oil. You’ll want to use 2-3 times as much jojoba oil as vanilla bean oil. It distills the scent, but also makes the mixture last longer.
5. Store your mixture in a cool, dry place. This will last for several months as long as you keep it from getting too hot.

The process is exactly the same as the process for making your own vanilla extract, except for step 4: adding oil.  If you wanted pure vanilla extract, follow steps 1-3 and then skip to step 5.  It's amazing and you should try it.

Something else I wanted to add is that you might want to use a dark colored glass jar instead of a clear one.  The less light that gets to the beans/alcohol mixture, the stronger, purer and better the solution will be.
I can't wait to get home today and start my own!!!
Read Comments

Friday, May 28, 2010

Bath Fun for the Kiddos

Since I'm in the bath and body mode today, I thought I'd share a fun little recipe I use for the kids bath.  Bath Fizzies.  Or Bath Bombs as some call them.  I was first introduced to these through a parenting message board I frequent. I ordered a few from a WAHM vendor on there and the kids loved them.  Begged to have them at every bath!!  They love to throw in the ball (or whatever molded shape) and watch it fizzle away!  So I started to look into how to make them myself.  Keep things a bit cheaper, plus, it gives me a project to do with the kids.  We're going to make up a batch of these really soon!

Bath Fizzies Baisc Recipe

1 C baking soda
1/2 C citric acid (available at drugstore/bulk foods)
1/2 C salts (dead sea or epsom)
1/2 C corn starch

Mix together all dry ingredients.

1 TBS water
1-2 TBS oil (any light vegetable oil will work; I've also used cocnut oil)
1-2 drops food coloring (if desired - makes for fun colors)
1-2 tsp essential oil (if desired - for fun)

Mix wet ingredients and add to dry ingredient mixture.  Now you have to work fast before the mix begins to set.  Take the mix and press into a mold.  Let them sit in a dry place, out of humidity for at least a day.  You can take them out of the mold reletively quickly as they will take shape and then let them dry out of the mold.  You can also use just about anything for a mold - ice cube trays, candy molds, plastic two piece christmas bulbs, etc. You can also take large scoops and use your hands to mold them into balls.
Read Comments

Summer Beauty

I don't know about anyone else, but I find it the hardest to keep my skin smooth, clean and clear in the summer months.  All that hot weather wreaks havoc on my skin, espcially on my face.  Between sunscreen (a must for the very fair like myself), sweat, bronzers (since we avoid the sun, must do something for a warm glow), and cholorine/salt water/sand etc, I'm a mess!  So what to do?

I think I've found a few answers.  And I plan to share them with you.  The best thing is that they work all year long - not just in the summer!!  And they are simple and natural.  No putting icky chemicals or things we can't pronounce on our faces!  And dare I say it, they are even a bit yummy?

I have a trick that not only cleans my face and helps keep it clear, but it also leaves me a rosy glow and tight happy pores.  This tricks uses a secret ingredient that I think truely is nature's superfood - Honey.  That's it.  Honey.  Use honey with a bit of warm water.  Rub it all over your face and then wash it off.  You could use crystallized honey for a bit of a scrub (works better than those acidy peels and masks) or mix it with a bit of witch hazel or chamoille for added benefit.  Green tea mixed with it is nice as well.  I keep my honey in a little glass jar next to the bathroom sink.

Now to keep skin looking healthy all over and to get rid of the dull skin look, I use a homemade sugar scrub in the shower.  It's easy peasy lemon squeezy to make.  Just take about 1/2 C of sugar (white or brown - I like brown cause it smells so good!) and enough cold-pressed oil (such as olive, peanut, coconut or sunflower) to make it damp.  You could add some essential oil to it as well for added aromatherapy (peppermint is a great picker-upper).  Rub it all over before you hop in the shower and your skin will glow!

You could even go crazy with the sugar scrub and mix it up a bit.  Try some mashed up banana instead of the oil.  Or use yogurt and some tomato for the alpha-huydroxy effect.

Does your hair need extra conditioning in the summer?  Dried out from too much sun or pool water?  Try mixing in about a 1/4 C of mayonaise and letting it sit for half an hour before washing out.  Or use an egg mixed with a bit of coconut oil. 

If your hair needs a bit of shine due to that sun and pool water again , mix about a tsp of HONEY (there it is again....my favorite superfood!) into about 4 C of water and mix into your hair after shampooing.  Do not rinse it out.

So there's a few of my natural summer beauty recipes.  Simple, clean and natural.  And best off all, they make you look and feel great!!
Read Comments

Wednesday, May 19, 2010

Father's Day Ideas....

Father's Day is coming up soon and I always tend to do last minute things.  Last year it was a Tshirt from Walmart with Snoopy on a motercycle that said, "Big Daddy."  It was cute and Mr. CrazyLife wears it all the time.  But I'd like to do something a little cuter and more meaningful this year.  So I started searching online.  I love online research!!  =)

I found this and can totally see doing it!!  It would be simple and easy and we'd just have to find a time when Daddy's workboots were unused and he was out of the house (that would be the tricky part - maybe we'll use an old pair of boots)  I'm going to look for a different quote to use, I think.  This one is cute, but I want something a bit different.  Thanks, Amber at The McIllece Spot for a fantastic idea!!


Read Comments

Thursday, April 8, 2010

Easter Eggs

This year, for the second time, we decided to try dying Easter eggs the natural way.  And by that I mean using plants and spices for the coloring.  Last year we used regular white eggs and had moderate results.  We liked how it turned out, but the colors were kind of, well, blah.

This year we tried again and used our brown eggs (and some white ones my mom had sitting around).  What a difference!  They turned out really nice.  They aren't bright, like the dyes you get from the store, but they sure are pretty!

(sorry for the picture quality....it's off my blackberry)

From the top row:  Dark Purple egg (dark brown to start) - grape juce
Brownish egg - black tea with red sugar crystals
Green egg - spinich

Next row:  All three Yellow Eggs - tumeric spice

Next two rows: All six orange eggs - yellow onion skins

Next row:  Yellow Egg - saffron spice
Reddish egg - cranberry juice
Green egg - celery seed

Bottom row: All three Green eggs - spinich

Pretty, no?
Read Comments

Wednesday, February 10, 2010

Ice Cube Sun Catchers

The other day when the kids and I got home from school, we decided to do a little craft project slash science project.  So we made ice cube suncatchers.  It's easy to do and fun for the wee things to make.  They like to to see how the food coloring changes the color of the ice and how the water goes from liquid to slush to solid.  Plus, they look really pretty hanging outside in the snow, catching that late winter sunshine!


First you make some colored ice cubes.  I used my little round ice cube maker (perfect for water bottles!) and since I had four colors and four wee helpers, we each picked one color and made two rows.


The kids were very interested in how the food coloring changed the water color.


Next step is to freeze those colored cubes solid.

Then you make another ice cube block.  We used one of the old plastic Gladware containers for this.  I don't use them for food anymore, but we keep crayons and nails and buttons and such in them.  When you make the ice block, be sure to put a cup full of water inside it at one end.  That will make the hole so you can hang it later.

Let the ice cube block freeze - but only partially.  Once it is slushy, take it out and add some colored ice cubes to it.  They will start to melt a bit and the colors will mix, so choose colors wisely.  My boys helped, so our colors turned out kind of mushy.  *laugh*

Stick the ice cube block back into the freezer to finish freezing.  We left ours in overnight.

Once it's totally frozen, take it out and add a string or ribbon through the hanging hole.  I used an old scrap of fabric to make it look pretty.  =)

Hang it outside somewhere where it will catch that winter sunshine and enjoy the colors!
Read Comments

Tuesday, February 2, 2010

Tomorrow is February 1st! And that means that Valentine's Day is right around the corner. Time to start thinking about the Valentine's the kids (or more likely I ) will be making for their friends, classmates and teachers.

So to get started with some motivation, I thought I'd post some great ideas I've found around the web.


****


Have any leftover mini candy canes from Christmas-time? Check out these cute Candy Cane Hearts from Pleasant Home. Super cute and super easy!


****


Or how about this supercute Valentine Countdown from Love Actually? I think my wee Things would totally get a kick out of this one - we do a Christmas countdown every year and they love it. Hmmm, maybe a countdown to every holiday? Craziness!


While you're there, check out all her other Valentine's Day ideas and links! Super fantastic!


****


If you're hosting a Valentine's dinner with a group of friends (as I am) or if you have a couple's group that gets together for dinner dates, how cute would this idea be?


An Amazing Race Amazing Valentine's Day dinner date!! Perfect for the adventurous!


****


There's a few great Valentine's Day ideas to get you started. Check back soon to see how I decorated our house for Valentine's and some more great ideas I've found around the web!
Read Comments