Showing posts with label green living. Show all posts
Tuesday, August 16, 2016
Homemade "Fabreeze"
Labels: family life, green living, housework, oils at 9:26 PM
One of our projects this summer was to get the kids' rooms cleaned, organized and re-decorated. We're about halfway there on the project. I spent about three days in our boys' room....mostly cleaning. Then I spent about one day in the girls' room doing the same. The kids helped and I mostly kept them on task and organized their cleaning.
Boy, my kids are super messy!!! I couldn't believe we had let it get to the point it was. Clothes all over the floor. Little bits of paper thrown around. Hair bands under the dresser. Hangers on the closet floor. Ties tied to the beds, shelves and other things in the room. Tubby Cubbies that were empty with the toys all over the place. Bags of "treasures" placed strategically around the room. Ugh!
One thing that was really, really bad was the trash in the boys room. It's like they wake up in the middle of the night and have a snack, but fall asleep while eating it. Yuck!!
And the smell. Tween-age and Teenage boys and girls are stinky!!!
But......I HATE the smell of most air fresheners. That chemically, artificial smell. So what to do? Create my own air freshener, of course!
Lately, I've been using essential oils quite a bit. I diffuse them. I do rollers. I have a necklace diffuser. I'm really liking the effect they have on my family and my home.
So I created a homemade "Fabreeze" and it's been working wonderfully! I spray the kids' beds, their blankets, the curtains....even our couch cushions have received the treatment. My house smells nicer and there is no funky kid smell in the bedrooms!
You will need:
A spray bottle (glass is best, but use what you have!)
water
essential oils - I used Lavender & Tea Tree (try Eden's Garden Oils.....my favorite!)
rubbing alcohol
My recipe:
Fill the water bottle almost to the top.
Add about 3 TBS rubbing alcohol.
Add 30-40 drops of your essential oils.
Shake before each use.
Spray on surfaces (it seems to dissipate too quickly in the air)
Enjoy!

Tuesday, February 28, 2012
Homemade Laundry Soap
Labels: green living at 3:03 PM
In the CrazyLife family, we have sensitive skin. Like really sensitive skin. Thing #4 breaks out in goose prickles if anything brushes on his skin and even the sensitive soaps and laundry detergents and such don't work. His poor little belly is always pimpled up.
So last summer I started making my own laundry soap, hoping it would help. And it did!
It was easy really. A couple bars of Fels Naptha soap, grated up. A cup of washing soda. A cup of borax. Mix. Use 1-2 tablespoons in each load. Sometimes I would add half a cup of baking soda as well. If I needed fabric softener, I would add vinegar to the rinse.
But we seemed to go through it so quickly. Even though it lasted longer than commercial laundry soaps, I felt like I was constantly grating soap and making more. I mean, we probably do about 16 loads of laundry a week, if you include all the towels and sheets. (not to mention all the clothes that somehow never make it into the dressers and get thrown back into the laundry, completely folded, when the kids are picking up their bedroom floors!)
So now on top of doing laundry ALL THE TIME, I was making laundry soap, ALL THE TIME.
Something had to be done.
Enter Pinterest (my newest internet obsession!).
I found a "recipe" for laundry soap that was basically the same as what I was doing, but it stretched it further....much, much further. In fact, the batch that I cooked up during Christmas break is still in use...with two and a half more mason jars to go!
Here it is...my miracle laundry soap: White Purse Laundry Soap
I did switch things up a bit and make it my own, but that is the basic formula/recipe that I used. Plus, it was kind of fun to do.....even the kids got in on the act.
Ingredients:
2 bars Fels Naptha or other soap of choice (I really want to try ZOTE soap as I've heard it has a great smell and is such a pretty pink color!)
2 cups Borax
2 cups Washing Soda (NOT BAKING soda!)
1 cup baking soda
6 cups water
Steps:
1. Heat water. Grate soap bars.
2. Add grated soap gradually to hot water and melt. Do not boil!
3. Turn off heat and add borax, washing soda and baking soda.
4. Pour into 4 quart size mason jars.
5. Add enough warm water to each jar to fill it almost to the top - to the "shoulders" of the jar, if you will.
6. Cover and let sit overnight.
This is a fun step....the water and soap mixture separate out and look really cool.
So last summer I started making my own laundry soap, hoping it would help. And it did!
It was easy really. A couple bars of Fels Naptha soap, grated up. A cup of washing soda. A cup of borax. Mix. Use 1-2 tablespoons in each load. Sometimes I would add half a cup of baking soda as well. If I needed fabric softener, I would add vinegar to the rinse.
But we seemed to go through it so quickly. Even though it lasted longer than commercial laundry soaps, I felt like I was constantly grating soap and making more. I mean, we probably do about 16 loads of laundry a week, if you include all the towels and sheets. (not to mention all the clothes that somehow never make it into the dressers and get thrown back into the laundry, completely folded, when the kids are picking up their bedroom floors!)
So now on top of doing laundry ALL THE TIME, I was making laundry soap, ALL THE TIME.
Something had to be done.
Enter Pinterest (my newest internet obsession!).
I found a "recipe" for laundry soap that was basically the same as what I was doing, but it stretched it further....much, much further. In fact, the batch that I cooked up during Christmas break is still in use...with two and a half more mason jars to go!
Here it is...my miracle laundry soap: White Purse Laundry Soap
I did switch things up a bit and make it my own, but that is the basic formula/recipe that I used. Plus, it was kind of fun to do.....even the kids got in on the act.
Ingredients:
2 bars Fels Naptha or other soap of choice (I really want to try ZOTE soap as I've heard it has a great smell and is such a pretty pink color!)
2 cups Borax
2 cups Washing Soda (NOT BAKING soda!)
1 cup baking soda
6 cups water
Steps:
1. Heat water. Grate soap bars.
2. Add grated soap gradually to hot water and melt. Do not boil!
3. Turn off heat and add borax, washing soda and baking soda.
4. Pour into 4 quart size mason jars.
5. Add enough warm water to each jar to fill it almost to the top - to the "shoulders" of the jar, if you will.
6. Cover and let sit overnight.
This is a fun step....the water and soap mixture separate out and look really cool.
7. Take the separated mixture and put it in your blender (not your mixer as I first tried - SUCH a MESS!) And blend until it whips up into a creamy pudding-like mixture. I had to do this in several steps in order to get through it all.
8. Clean out the mason jars used above and re-pack the pudding-like soap mixture into the jars. I was able to fill 6 1/2 quart size mason jars with the finished project.
9. Add a cute label and move to your laundry space.
(seriously, my laundry room is never that clean......no matter how much I wish it was! But doesn't it look so nice in pictures???!!!)
I'm using about one tablespoon in each load of wash and as I mentioned above, we're on two and a half months of the same batch....with two and a half jars left to go. It cleans just as well, if not better than my powdered mixture and is lasting so long, so it's super economical!
The best part is that our family's skin is happy and goose prickle free!
Saturday, April 2, 2011
Serendipity Mommy and The Cupcake Bandits Great Going Green Event!!!
Labels: garden, giveaways, green living at 2:39 PM
Candy at Serendipity Mommy and Christine at The Cupcake Bandits are hosting a Going Green Event during the Month of April. Follow these two dynamic bloggers as they plant and harvest their first ever gardens and take other steps to living a greener lifestyle. It's going to be a great ride!!!
And did I mention the FABULOUS prizes they are giving away???
You simply must check this out.
(but maybe you shouldn't enter, because I totally want to win myself! =) )
Thursday, March 24, 2011
Growing your own Dishcloths - Luffa Gourds
Labels: garden, green living at 10:20 AM
Did you know you can grow your own dishcloths and luffa sponges?
How cool is this??
There are seven species of the plant luffa cucurbitaceae. These plants can be planted after all danger of frost has passed. They like a trellis to grow on. Fruit can be harvested about 100 days if used for eating, wait another 30 or so days if you plan on harvesting to make a luffa or dishcloth.
To dry into a dishcloth, pick when the fruit is yellowing. Remove the skin and seeds. Shake out. Soak overnight in water. Remove from water and sit in sun to dry.
You can use this sponge for bathing, washing dishes, cleaning clothes, etc.
Here are a couple links to more on this topic:
Groovy Green - How to Make (and grow) A Luffa!
Groovy Green - More on How to Grow a Luffa
How awesome! Guess what I'm adding to my seed order to grow this summer?
To dry into a dishcloth, pick when the fruit is yellowing. Remove the skin and seeds. Shake out. Soak overnight in water. Remove from water and sit in sun to dry.
You can use this sponge for bathing, washing dishes, cleaning clothes, etc.
Here are a couple links to more on this topic:
Groovy Green - How to Make (and grow) A Luffa!
Groovy Green - More on How to Grow a Luffa
How awesome! Guess what I'm adding to my seed order to grow this summer?
Tuesday, February 15, 2011
While on the subject . . . .
Labels: green living, housework at 2:26 PM
Since I'm on the subject of make-your-own cleaning supplies, here's a few others we've been using and having great successes with!!! As mentioned before, it is a bit time consuming to set up, but once you see the results and compare the monetary savings, you'll totally be into it!
My homemade dishwasher detergent:
Equal parts borax and washing soda ( I used about 3/4 C each)
1/4 C baking soda
about a 1/4 cup citric acid
Mix
Use about 2 TBS per load
I've also used unsweetend lemonaide KoolAid (2 packets) if I'm out of citric acid. Same difference, plus a nice lemony smell. I always use white vinegar in the rinse cycle as well.
Also, you want to make sure you rinse well . . . borax left on dishes isn't healthy. Although I'm sure it the's same with commercial detergents. I will sometimes run a second rinse.
And I've read some conflicting things about combining washing soda with baking soda, but I've never had an issue with it. Research. Experiement. Find what works for you!
My homemade dishwasher detergent:
Equal parts borax and washing soda ( I used about 3/4 C each)
1/4 C baking soda
about a 1/4 cup citric acid
Mix
Use about 2 TBS per load
I've also used unsweetend lemonaide KoolAid (2 packets) if I'm out of citric acid. Same difference, plus a nice lemony smell. I always use white vinegar in the rinse cycle as well.
Also, you want to make sure you rinse well . . . borax left on dishes isn't healthy. Although I'm sure it the's same with commercial detergents. I will sometimes run a second rinse.
And I've read some conflicting things about combining washing soda with baking soda, but I've never had an issue with it. Research. Experiement. Find what works for you!
A Laundry Detox
Labels: green living, housework at 2:18 PM
As most of you know, we have been taking steps to "green" up and detoxify our home and lives. Baby steps, for sure, but steps. When the kids were babies, we used mostly cloth diapers. I've already written about my choices for Mama Cloth. We try to recycle almost everything and thankfully our waste management takes it all. I now have a second grade recycling ninja, so we're recycling even more things. =) We use a lot of cloth napkins instead of paper. We use mostly cloth dusting cloths and floor mops. I just picked up a steam mop to clean the floor with so we would not have to use any chemicals. We always garden and compost. We eat only grass-fed meat and raise our own cows and chickens and pigs.
Little things, but they all add up.
My most recent step was taking a look at the cleaning products I use in the house and trying to "green" them. Now, I mostly had been using store-bought "green" cleaners such as Greenworks or the store natural brands. But I still wasn't happy with the chemical smell or the ingredients, not to mention the fact that they really didn't do the job.
So I branched out. I decided to start making my own cleaners, for the most part. I joined Shaklee and began using their products. And now I'm addicted to making my own laundry soap, dishwasher detergent and shower cleaners. Among others . . . .
Here is my laundry detergent recipe. It's quite simple to make, although a bit time-consuming. I enlist the help of the above-mentioned second grade recycle ninja to help with the shredding of the soap. =) And the little ones help to make sure all the little pieces of shredded soap make it into the container. A family affair!
1 C borax
1C washing soda (NOT baking soda!)
2 C Fels Naptha or other unscented soap
Mix
Use 2 TBS per laundry load
I find that this recipe gets me through one week of laundry - about 12-15 loads. You could probably add some essential oil if you prefer a scented soap. I've found that our clothes are so soft and just clean-smelling. No real scent. Just clean. I can't wait to try this with hanging the clothes on our laundry line!
You can also make liquid laundry soap. There are TONS of recipes out there on the good 'ole WWW. Here is a page with lots of them to try: Tipnut - Homemade Laundry Soap
The lowdown on the cost of making this laundry soap. The Fels Naptha soap was $1.25 for a 5.5 oz bar. I used about half a bar in the recipe. The washing soda was $2.75 for 55 oz. The borax was $2.99 for a 75 oz box. Doing the math, I figured a cup of washing soda to be about 4 ounces and a cup of borax to be about 3.2 oz. So the washing soda is about 20 cents/batch. The borax is about 15 cents/batch. And the soap is 63 cents/batch. Grand total of 98 cents/batch. Divide this by the 15 loads I got done and it turns out to 6 cents per load! SIX cents!
My regular laundry detergent was $8.79 and it lasted for about 35 loads = 25cents per load. That's a difference I can deal with!
Now if I could only find a way to magically have all the clean, folded laundry weave it's way to dressers and closets without my taking it there . . . .
Little things, but they all add up.
My most recent step was taking a look at the cleaning products I use in the house and trying to "green" them. Now, I mostly had been using store-bought "green" cleaners such as Greenworks or the store natural brands. But I still wasn't happy with the chemical smell or the ingredients, not to mention the fact that they really didn't do the job.
So I branched out. I decided to start making my own cleaners, for the most part. I joined Shaklee and began using their products. And now I'm addicted to making my own laundry soap, dishwasher detergent and shower cleaners. Among others . . . .
Here is my laundry detergent recipe. It's quite simple to make, although a bit time-consuming. I enlist the help of the above-mentioned second grade recycle ninja to help with the shredding of the soap. =) And the little ones help to make sure all the little pieces of shredded soap make it into the container. A family affair!
1 C borax
1C washing soda (NOT baking soda!)
2 C Fels Naptha or other unscented soap
Mix
Use 2 TBS per laundry load
I find that this recipe gets me through one week of laundry - about 12-15 loads. You could probably add some essential oil if you prefer a scented soap. I've found that our clothes are so soft and just clean-smelling. No real scent. Just clean. I can't wait to try this with hanging the clothes on our laundry line!
You can also make liquid laundry soap. There are TONS of recipes out there on the good 'ole WWW. Here is a page with lots of them to try: Tipnut - Homemade Laundry Soap
The lowdown on the cost of making this laundry soap. The Fels Naptha soap was $1.25 for a 5.5 oz bar. I used about half a bar in the recipe. The washing soda was $2.75 for 55 oz. The borax was $2.99 for a 75 oz box. Doing the math, I figured a cup of washing soda to be about 4 ounces and a cup of borax to be about 3.2 oz. So the washing soda is about 20 cents/batch. The borax is about 15 cents/batch. And the soap is 63 cents/batch. Grand total of 98 cents/batch. Divide this by the 15 loads I got done and it turns out to 6 cents per load! SIX cents!
My regular laundry detergent was $8.79 and it lasted for about 35 loads = 25cents per load. That's a difference I can deal with!
Now if I could only find a way to magically have all the clean, folded laundry weave it's way to dressers and closets without my taking it there . . . .
Monday, January 17, 2011
Make Your Own Vanilla Perfume
Labels: crafts, green living, homesteading at 2:02 PM
I've never been a big scented lotion or perfume user. I'm not sure why, I just never had. I'm the kind of person who finds something they like and sticks with it forever or until the company stops making it. Which is just what has happend to my favorite perfumes and lotions.
My favorite lotion is the Bath and Body Works Plumeria scent. It was my signature scent throughout college. Friends said my dorm room even smelled like it. Then about 4 years ago, they discontinued it. I was so sad. This past holiday season they brought it back out and I bought about five bottles to tide me over for a while!
My other signature scent is vanilla. I've always been a huge fan of vanilla scents. It's my all-time favorite smell. It reminds me of cooking with my Gram. It reminds me of something warm and homey. I love it. However, I've never found a vanilla perfume or lotion that works for me. I did use Vanilla Fields for a long time, but then it changed. I like a pure vanilla smell - not a fruity, flowery, musky one.
So I've been on the lookout for something with either of these two scents for a long time. I've searched out making your own and so forth and never really come across anything.
Imagine my suprise and delight when I came across this post today from Natural Mommie: How to Make Vanilla Perfume. I was so excited!! I can't wait to get home and start my own vanilla oil perfume!!
Here's what you need:
-Knife
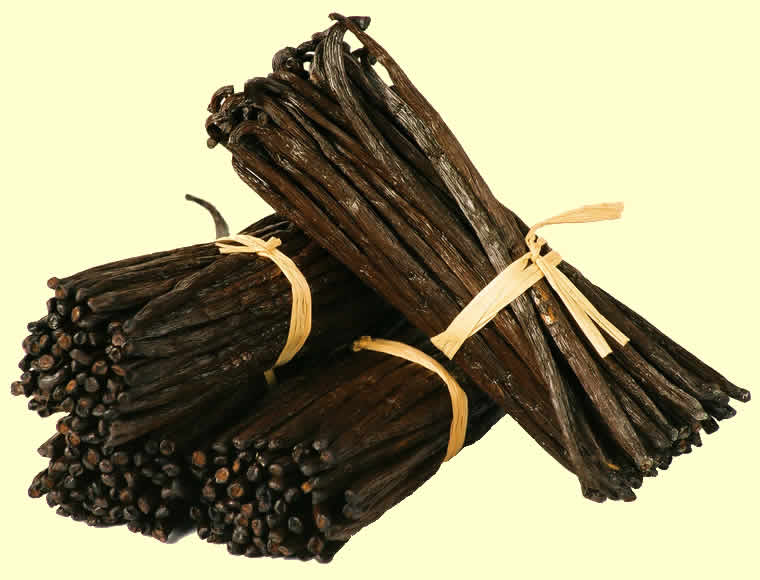
– Vanilla beans
– Vodka
– Glass jar
– Strainer {mesh, nylons or cheesecloth}
– Jojoba oil {or any oil – grapeseed, etc.}
Check your local health food store for vanilla beans or any store that sells bulk spices. Sometimes you can find them at the grocery, but they tend to be more expensive there. I'm also planning on using coconut oil - that should make a nice blend with the vanilla (despite my claims of PURE vanilla scent love above! =) )
Directions:
1. Take your knife and gently cut down the middle of the vanilla bean lengthwise. Scrape your knife along the inside edge of the bean to release the paste. Drop the paste into a glass jar. Cut the rest of the vanilla bean into small pieces and drop those in the jar as well. You can use as many vanilla beans as you wish.
2. Pour vodka directly into the glass jar, on top of the vanilla beans. Add enough alcohol to cover all the bean pieces. This allows the alcohol to soak into the beans and absorb the scent of their oils.
3. Place the container in a warm, dry place and let stand for 2 weeks to 2 months Remove the lid every few weeks to test the strength of the scent. Use when ready. Strain out the small pieces of vanilla. You’ll want the perfume to be nice and smooth without any pieces that might irritate your skin.
4. Add your strained alcohol mixture back into your glass jar and top it off with jojoba oil. You’ll want to use 2-3 times as much jojoba oil as vanilla bean oil. It distills the scent, but also makes the mixture last longer.
5. Store your mixture in a cool, dry place. This will last for several months as long as you keep it from getting too hot.
The process is exactly the same as the process for making your own vanilla extract, except for step 4: adding oil. If you wanted pure vanilla extract, follow steps 1-3 and then skip to step 5. It's amazing and you should try it.
Something else I wanted to add is that you might want to use a dark colored glass jar instead of a clear one. The less light that gets to the beans/alcohol mixture, the stronger, purer and better the solution will be.
I can't wait to get home today and start my own!!!
My favorite lotion is the Bath and Body Works Plumeria scent. It was my signature scent throughout college. Friends said my dorm room even smelled like it. Then about 4 years ago, they discontinued it. I was so sad. This past holiday season they brought it back out and I bought about five bottles to tide me over for a while!
My other signature scent is vanilla. I've always been a huge fan of vanilla scents. It's my all-time favorite smell. It reminds me of cooking with my Gram. It reminds me of something warm and homey. I love it. However, I've never found a vanilla perfume or lotion that works for me. I did use Vanilla Fields for a long time, but then it changed. I like a pure vanilla smell - not a fruity, flowery, musky one.
So I've been on the lookout for something with either of these two scents for a long time. I've searched out making your own and so forth and never really come across anything.
Imagine my suprise and delight when I came across this post today from Natural Mommie: How to Make Vanilla Perfume. I was so excited!! I can't wait to get home and start my own vanilla oil perfume!!
Here's what you need:
-Knife
– Vanilla beans
– Vodka
– Glass jar
– Strainer {mesh, nylons or cheesecloth}
– Jojoba oil {or any oil – grapeseed, etc.}
Check your local health food store for vanilla beans or any store that sells bulk spices. Sometimes you can find them at the grocery, but they tend to be more expensive there. I'm also planning on using coconut oil - that should make a nice blend with the vanilla (despite my claims of PURE vanilla scent love above! =) )
Directions:
1. Take your knife and gently cut down the middle of the vanilla bean lengthwise. Scrape your knife along the inside edge of the bean to release the paste. Drop the paste into a glass jar. Cut the rest of the vanilla bean into small pieces and drop those in the jar as well. You can use as many vanilla beans as you wish.
2. Pour vodka directly into the glass jar, on top of the vanilla beans. Add enough alcohol to cover all the bean pieces. This allows the alcohol to soak into the beans and absorb the scent of their oils.
3. Place the container in a warm, dry place and let stand for 2 weeks to 2 months Remove the lid every few weeks to test the strength of the scent. Use when ready. Strain out the small pieces of vanilla. You’ll want the perfume to be nice and smooth without any pieces that might irritate your skin.
4. Add your strained alcohol mixture back into your glass jar and top it off with jojoba oil. You’ll want to use 2-3 times as much jojoba oil as vanilla bean oil. It distills the scent, but also makes the mixture last longer.
5. Store your mixture in a cool, dry place. This will last for several months as long as you keep it from getting too hot.
The process is exactly the same as the process for making your own vanilla extract, except for step 4: adding oil. If you wanted pure vanilla extract, follow steps 1-3 and then skip to step 5. It's amazing and you should try it.
Something else I wanted to add is that you might want to use a dark colored glass jar instead of a clear one. The less light that gets to the beans/alcohol mixture, the stronger, purer and better the solution will be.
I can't wait to get home today and start my own!!!
Saturday, January 15, 2011
Natural Air Fresheners
Labels: green living at 11:38 AM
Have you ever come home, walked into the house and thought, "What in the heck is that smell?"
I did the other day. Our house just had a stale, closed up smell. Everything that could possibly leave a scent in the air was and they were all fighting for dominence. It was not pleasant.
Sometimes the smells of the house, cooking food, a full garbage can, pet smells, dirty clothes in the laundry room, dusty, stale closed up smells seem to take over. We just can't get rid of them.
So what do you do? Do you pull out that can of air freshener you bought at the store? Does it help?
Or does it add another unwanted smell to the house? A chemical smell? An aerosol smell? And does it last?
I've moved away from using those scents in a can sprays to freshen the house. They just don't do the job the way I'd like. Plus, the scents offered are nothing that I want my house to smell like! I'm trying to get a more natural way to freshen the house.
One of the best ways I've found to freshen the house is to open windows. In the summer, the windows here at the farmhouse are always open. Always. As soon as the frost is out of the air in the spring, we start opening them for a little bit each day. The only times we close them are during plowing times, because the dust that flies is crazy! In even the winter, if there is a warm day, say over 35, I'll open the windows a wee bit. It gets cold, but it certainly freshens the air.
Another thing I do is to make my own air freshener spray. I'll boil some water with a bit of sage and sea salt. Once it cools you can put it in a spray bottle. Use it to spray the walls, the garbage can, furniture, sheets/bedding etc. I imagine you could put other scents into it instead, but I've found that the sage stays quite well. Keep it in the refridgerator.
Something else I like to do is to do a stove-top air freshener. Take some water, add cinnamon sticks, orange peels, lemon peels, vanilla beans, sage, etc to it and bring to a boil. Turn it down and let it simmer. The wonderful smells will fill the house!
Experiement! See what works in your house. Try freshening your house the natural way ... you'll never go back!
Thursday, January 13, 2011
Punctuation
Labels: green living, randomness at 10:14 AM
Let's talk for a moment about something we all hate to talk about (and deal with.) You know what I'm talking about. AF. Our lovely monthly visitor. The thing we all look forward to getting when we're 12 and hate by the time we're 13. Yep.....that punctuation....the period.
This is on my mind today because my lovely little friend decided to suprise me a whole WEEK early this month! This almost never happens to me and it really set me off. So a bit of a rant and some ideas to help "green up" a very personal issue.
Now, let me start off by saying that I have been a bit blessed in this area. I didn't start until I was 12 and my periods have always been fairly light and short and absolutly regular. But I still hate dealing with it. I've always hated the feeling of those paper sanitary pads. They itch. They rub funny. They are crinkly. And they are expensive. Plus, I hate the thought of all that "stuff" sitting around in a landfill for almost ever. Between disposible diapers and disposible sanitary napkins, future archeologists are going to make some interesting conclusions about our society!
So, partly in tune with trying to "green" up my life and partly due to the suggestions of friends and partly just to see what the fuss was all about. So I tried "Mama Cloth" and they have changed my life....one month at a time!
I first used cloth pads postpartum with my second child, six years ago. I had bought some from a local cloth diaper store. They were the only brand she carried (and they are still my favorite brand). At first, they did feel a bit bulky, but I got used to that quickly. What amazed me the most was that my postpartum period (hah, what a pun!) lasted a much shorter time than with my first child. And then once my ummm, punctuation returned 8 months later, it too was shorter and lighter than ever before. And each month since has been the same. My periods went from lasting 5-7 days with a medium flow to about 3-4 days with a light flow. It's amazing.
Now, I don't know why this is. There are the rumors, of course. Companies put some kind of chemical into the pads/tampons to make you bleed more. Therefore you need more of their product, yada yada yada. I'm not sure I buy it. But whatever the reason.....I've found it to be true. Cloth pads make my time of the month last a shorter time and a much lighter time.
It seems strange to us to think of using cloth pads, I'm sure. I mean, you never see this on TV, right? But forever, up until about 50 years ago, this was the norm. Using something disposible would have been unthinkable. I mean, how did Eve take care of her monthly issue? Or the pilgrims? Or Queen Elizabeth the first? No matter what, all women throughout time have had to deal with this. And they all did it without the use of something disposible. So maybe it isn't all that weird afterall? Check out this link from the Menstration Museum.
There are all kinds of Mama Cloth out there. Tons of WAHM 's make them and sell them. You'll have to try a bunch to find what you like. There are also more natural internal systems, the Diva Cup and the Keeper among others. I personally love the Happy Heiny brand and Luna Pads, but have a bunch of others as well. They come in all sizes and shapes, with or without wings, snap or velcro or pin closure, pillowcase style or not. Find what works for you.
Now the question arises of what one does with the pads after use and before washing. Or what to do when on the go. Or just how to deal with the cloth at all. Here's what I do.
I keep a small, covered bucket in my master bathroom. After I change a used pad, I set it in the bucket, which contains cold water. I soak the pads for the duration of my AF (usually 3-4 days). I then dump the water into a smaller container. The soaked pads are thrown into whatever load of laundry is ready to run, although I do usually throw them in with towels or sheets. The water I save for watering plants (my roses love it!), but I do use it quickly. Mr. CrazyLife really doesn't like this part of the process. I do not dry the pads in the dryer. I hang them dry. It's not complicated and aside from some strange looks from your family members the first few times, not a huge issue anywhere.
There are other options out there as well....diva cups, moon cups and the like. I've never tried them, but have heard rave reviews. Just not my thing, I guess.
So for anyone out there sharing my pain right now, look into some greener, cleaner, healthier options....you'll be glad you did!
This is on my mind today because my lovely little friend decided to suprise me a whole WEEK early this month! This almost never happens to me and it really set me off. So a bit of a rant and some ideas to help "green up" a very personal issue.
Now, let me start off by saying that I have been a bit blessed in this area. I didn't start until I was 12 and my periods have always been fairly light and short and absolutly regular. But I still hate dealing with it. I've always hated the feeling of those paper sanitary pads. They itch. They rub funny. They are crinkly. And they are expensive. Plus, I hate the thought of all that "stuff" sitting around in a landfill for almost ever. Between disposible diapers and disposible sanitary napkins, future archeologists are going to make some interesting conclusions about our society!
So, partly in tune with trying to "green" up my life and partly due to the suggestions of friends and partly just to see what the fuss was all about. So I tried "Mama Cloth" and they have changed my life....one month at a time!
I first used cloth pads postpartum with my second child, six years ago. I had bought some from a local cloth diaper store. They were the only brand she carried (and they are still my favorite brand). At first, they did feel a bit bulky, but I got used to that quickly. What amazed me the most was that my postpartum period (hah, what a pun!) lasted a much shorter time than with my first child. And then once my ummm, punctuation returned 8 months later, it too was shorter and lighter than ever before. And each month since has been the same. My periods went from lasting 5-7 days with a medium flow to about 3-4 days with a light flow. It's amazing.
Now, I don't know why this is. There are the rumors, of course. Companies put some kind of chemical into the pads/tampons to make you bleed more. Therefore you need more of their product, yada yada yada. I'm not sure I buy it. But whatever the reason.....I've found it to be true. Cloth pads make my time of the month last a shorter time and a much lighter time.
It seems strange to us to think of using cloth pads, I'm sure. I mean, you never see this on TV, right? But forever, up until about 50 years ago, this was the norm. Using something disposible would have been unthinkable. I mean, how did Eve take care of her monthly issue? Or the pilgrims? Or Queen Elizabeth the first? No matter what, all women throughout time have had to deal with this. And they all did it without the use of something disposible. So maybe it isn't all that weird afterall? Check out this link from the Menstration Museum.
There are all kinds of Mama Cloth out there. Tons of WAHM 's make them and sell them. You'll have to try a bunch to find what you like. There are also more natural internal systems, the Diva Cup and the Keeper among others. I personally love the Happy Heiny brand and Luna Pads, but have a bunch of others as well. They come in all sizes and shapes, with or without wings, snap or velcro or pin closure, pillowcase style or not. Find what works for you.
Now the question arises of what one does with the pads after use and before washing. Or what to do when on the go. Or just how to deal with the cloth at all. Here's what I do.
I keep a small, covered bucket in my master bathroom. After I change a used pad, I set it in the bucket, which contains cold water. I soak the pads for the duration of my AF (usually 3-4 days). I then dump the water into a smaller container. The soaked pads are thrown into whatever load of laundry is ready to run, although I do usually throw them in with towels or sheets. The water I save for watering plants (my roses love it!), but I do use it quickly. Mr. CrazyLife really doesn't like this part of the process. I do not dry the pads in the dryer. I hang them dry. It's not complicated and aside from some strange looks from your family members the first few times, not a huge issue anywhere.
There are other options out there as well....diva cups, moon cups and the like. I've never tried them, but have heard rave reviews. Just not my thing, I guess.
So for anyone out there sharing my pain right now, look into some greener, cleaner, healthier options....you'll be glad you did!
Subscribe to:
Posts (Atom)